In the released material which comes with the emulator you will find a text file hello world.txt the purpose of which will be well-known to readers. Within the Atlas 1 emulator system, rich text files such as this stand in for reels of seven-track paper tape in the real Atlas 1. Here are the contents of the file
     JOB
     HELLO WORLD
     OUTPUT
     0 ANY 100 LINES
     COMPILER ABL
         0101  1  0  A9
         1066  1  0  A9+0.4
         1117  0  0  0
     9)  CT2.1
     HELLO WORLD
         EA0
     ***Z
For the benefit of readers unfamiliar with Atlas 1, each part of the file is explained in the link Hello World Explained below. For really authoritative information about Atlas 1 programming you may like to refer to The ABL manual and Preparing a Complete Program for Atlas 1
It should be pointed out at this stage, that the job description line 0 ANY 100 LINES does not have quite the same meaning in the emulator as it does in the real Atlas 1. ANY is taken to mean that the output should be displayed in a window (rather than written to a Windows file) but that the output channel with otherwise have the characteristics of an 80-column card punch.
You may like to peruse footnote 1 below though it is not essential at this stage.
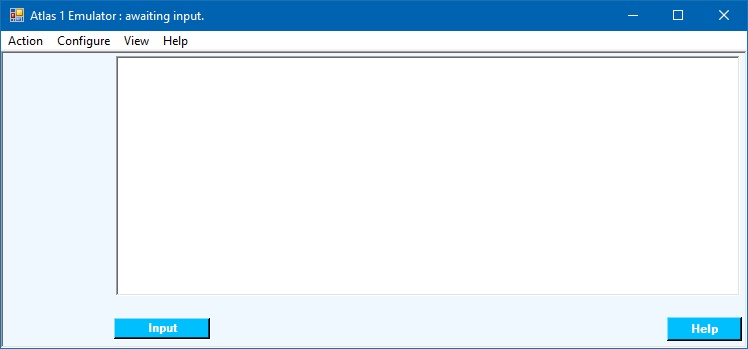
On entering the emulator, the main display window will be seen –

Clicking the  button will bring up the usual Windows
file selection dialogue.
You will notice that the Windows files offered are of types .txt or
.rtf which respectively represent input coming in to the Atlas system
from a Card Reader and a Paper Tape Reader
respectively.
Select the hello world.rtf file.
The emulator will respond by reading the selected file and copying it to the internally-held job queue. If there is only one job in the queue which is ready to run (but see footnote 2 below if it isn’t) then the program will be compiled by the built-in ABL compiler. The object code of the program is now present in the store and is ready to go.
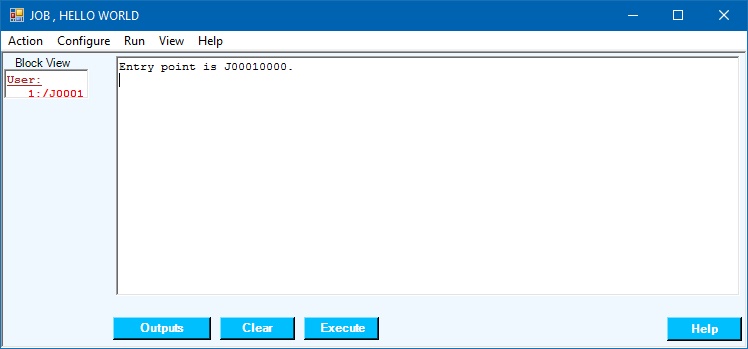
The main window will then change.

The reader will notice several differences from the previous state but the one which we will
address here is that the repertoire of actions offered to you has changed.
In this case we will ignore most of them and click the  button
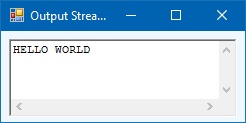
which will cause the desired output to appear in a new window –

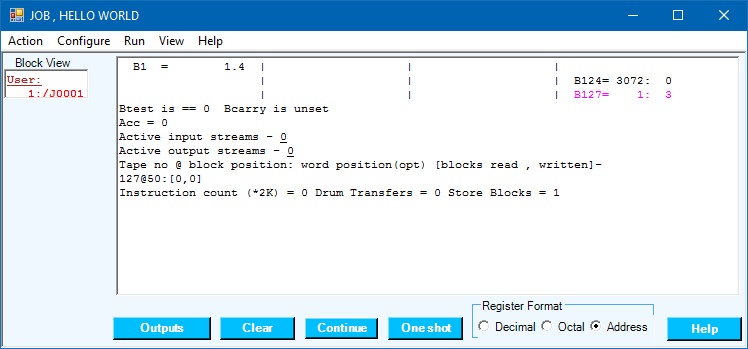
At the same time the main window has changed again –

If now we click  output window will disappear and the emulator will
return to its initial state ready to accept another input file.
However, before we leave this help page, there are a few useful observations to make about what we have seen.
Firstly, you will have noted that in the final image of the main window there is some information about the contents of various registers (especially the non-zero B-registers). If the program had terminated with a fault, then a fault report would be there also. This part of the display is similar to the information you might get in the event that your program in the real Atlas 1 had failed and may be useful in helping you to diagnose faults in your programs. Of course, this example program is pretty trivial so there is very little information to be had but more typically there will be a great deal. In particular the value of the control register B127 give the address of the next instruction to be obeyed.
The second thing of note is that near the top left of the last 2 images of the main window is a list of the store pages (“blocks” in Atlas parlance) present –

This will be considered in more detail when we come to look at our next program “Primes” so if you're ready to move on that’s where we should go next.
1) Input on Punched Cards
In this sample program, the input is a Rich Text File (.rtf) which can be produced using Wordpad, Microsoft Word or any similar program. The other form of input is a plain text file (.txt) representing punched cards. .txt files can be produced by Notepad Notepad++ or something similar. In the case of a pack of punched cards, the terminator would have been a 7 and 8 punched in column 1 and a Z in the last column of the card (column 80). The Unicode character ⅞ stands in for the former in the emulator. But the rules are relaxed in that the Z may occur in any column as long as it is the last on the ‘card’.
It will not, perhaps have escaped readers’ notice that the character ⅞ does not occur on the keyboard of a PC. However, if you go into the emulator and type Control/7/8, the ⅞ character will be put into the clipboard and can be pasted into your text file using a text editor.
There is a second version of this program as a pack of 80-column cards in file hello world.txt which can be used if preferred.
2) The Job Queue
Just as in the real Atlas 1, there may be more than one job awaiting its turn to run. In this case a new window will appear showing a list of waiting jobs –

Jobs listed in green are eligible to run, those in red are waiting for an input document or for a magnetic tape to be created.
Selecting one of the waiting jobs causes the display to change –

In this case, clicking  causes the selected job to start.
You will note that there are several other actions available to the user at this point.
Of these  (self-explanatory) and
 (re-creates the job description and reports what
(if anything) the job is waiting for) are the most important.
Feel free to explore the other action buttons.
This “job scheduler” bears no resemblance to the job scheduler in the real Atlas 1 which was fully capable of running without operator intervention and usually did. In the emulator, however, we are more concerned with demonstrating how Atlas 1 functioned rather than with maximising throughput.
| The Primes Program | Hello World Explained | Home |