This is a rather more complex program than we saw in the previous section. The Sieve of Eratosthenes works as follows –
   for (i = 2 ; i < n ; i++)
     bit[i] = 1;
   for (i = 2 ; i ** 2 <= n ; i++)
     if (bit[i] == 1)
       for (j = i ** 2 ; j <= n ; j += i)
         bit[j] = 0;
   for (i = 2 ; i < n ; i++)
     if (bit[i] == 1)
       print(i);
In other words, we start by creating a long bitmap, each bit being set to 1.
- Then we knock out every 2nd bit except bit 2 – bit 4, 6, 8, 10....
- Then we knock out every 3rd bit except bit 3 – bit 6, 9, 12, 15.....
- We would knock out every 4th but the 4th is unset, so we know we already did that.
- Then we knock out every 5rd bit except bit 5 – bit 10, 15, 20, 25.....
And so on.
Once we've done that the only remaining bits set to 1 correspond to the set of prime numbers.
The ABL program to do all that stretches to two pages so, rather than include it in this page, you can look at it here.
But we are really only interested in the first few lines in this tutorial, so here they are –
2)    H 1000
1)    0101    1    0  A2
      1362    0    0  a0/9     | set mask of bits
      0121    3    0  2        | b3 = 2
3)    1362    0    0  a0/4     | unset every b3th bit
      0124    3    0  1        | b3++
      0121  127    0  a3       | repeat until b3 == b1
      [end of main calculation]
      .
      .
      .
We start off as we did before, by inputting the program and compiling it, this time from the supplied file job primes.rtf. Now we see the main window transformed slightly differently (there are some messages which our program has told the compiler to print)
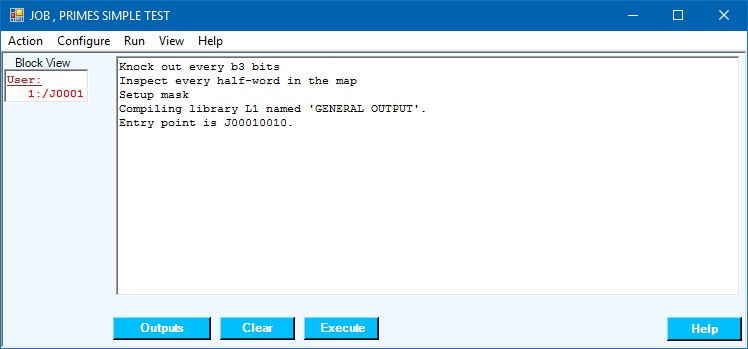
but if we click the (only) entry in the page list (page 1:) we will see a display of the contents of store page and if we ask to see the content interpreted as decimal and instruction we should see this –
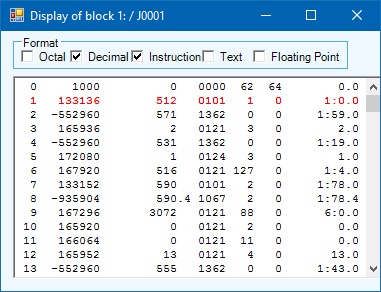
You will note that the initial halfword contains the integer 1000 taken from the first line of our program. Thereafter, from word 1 onwards, you will recognise the instructions of the program we’ve just compiled but now in compiled form. Word 1 is shown in red because this is the next instruction which the computer must obey.
We’ve started to move beyond the facilities which were made available to the programmer by the original Atlas 1. We can now see how the compiler has translated our program. But we can do more than that, much more.
If we click (for example) word 3, that line will be highlighted in yellow (as will the page number (1:) in the main display). This is known as “setting a breakpoint”. By the way, clicking word 3 again will unset the breakpoint.
As before, clicking the  button will start the program running,
but this time it only gets as far as the breakpoint we’ve set before pausing.
The main window has changed –
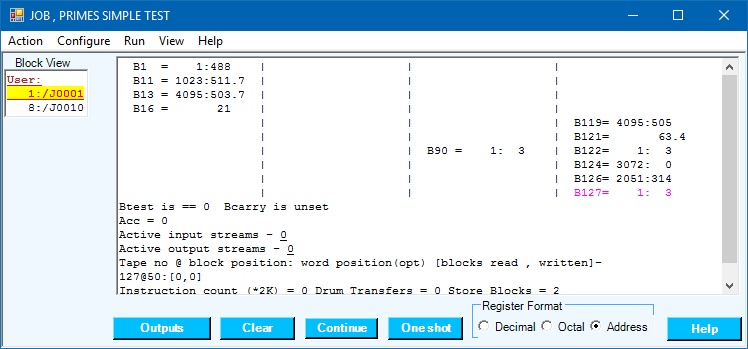
You will notice several changes –
- A number of B-Registers have acquired non-zero values having been used thus far.
- The set of available action buttons has changed.
- A new store page, page 8: has appeared in the list of store pages.
Clicking page 8: and asking for the contents of the page to be displayed in octal causes the bitmap to be displayed. You will note that every bit from bit 2 to bit 1000 is set to 1.
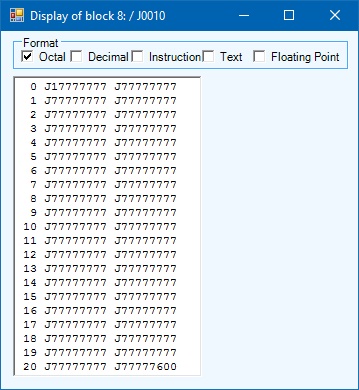
Now go back to the display of page 2: set a second breakpoint
at word 5 and click  .
The program restarts and goes around the loop, pausing again at word 5.
If we look again at page 8: we will see that all the even numbered bits,
bit 4 to bit 1000, have been set to 0.
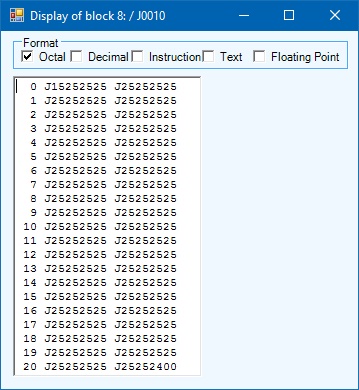
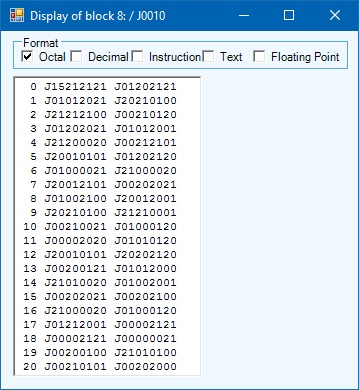
We could go around this loop a further 30 times before the program decides it has done enough ((30 + 2)2 > 1000) by which time, our initially densely-packed bitmap will be looking rather sparse; more so at the end than at the beginning which is what you might expect;
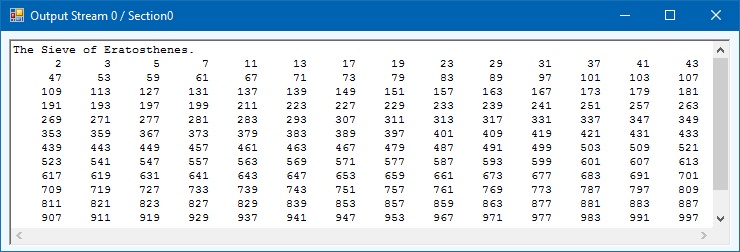
and the print loop (too dull to explore here) is entered and produces the required output.
In this help page we’ve seen debugging facilities over and above those available in the real Atlas 1. There is, however, more.
To learn more about debugging Atlas 1 programs in the emulator select More Development Facilities below.
However, you may prefer to find out about more input/output facilities in the emulator in which case select Input/Output Facilities below.
| Input/Output Facilities | More Development Facilities | Home |